
Key Takeaways
RV Starlink installation requires a different approach from residential setups because the equipment must accommodate mobility and changing environments.
Choosing a location with a clear view of the sky is essential because trees, buildings, and other obstructions can interfere with satellite connectivity.
A secure and weather-resistant mounting system helps protect the Starlink dish from wind, vibration, and other conditions encountered during RV travel.
Selecting the right mount-roof, ground, or adjustable-can improve stability and make the system easier to use at different destinations.
Proper dish positioning and alignment are important for maintaining a strong and reliable satellite connection.
Regular inspections, cleaning, secure hardware checks, and software updates can help maintain long-term performance.
Troubleshooting should begin with basic checks such as dish alignment, wiring, mounting stability, and the Starlink app before moving to more advanced solutions.
Understand What Makes RV Starlink Installation Different
What Makes RV Installation Different From a Regular Setup?
Installing Starlink on an RV presents challenges that don’t typically occur with a stationary residential installation. The biggest difference is mobility. RV owners frequently travel between campgrounds, parks, and remote locations, meaning the equipment must perform reliably in changing environments.
A successful rv starlink installation should account for changing terrain, potential obstructions, weather conditions, and the need to reposition equipment when necessary. Unlike a permanent home installation, an RV setup needs to balance reliable connectivity with portability and convenience.
Wind resistance is another important consideration. Equipment mounted to an RV must be securely fastened to prevent movement or damage. A poorly secured dish or mount can become a safety concern, particularly during strong winds or while the vehicle is being prepared for travel.
Tools You’ll Need for a Smooth Installation Process
Having the right tools can make installation easier and help ensure that the equipment is mounted securely. Commonly useful tools include:
- Drill with appropriate bits: Helps create secure mounting points when required.
- Wrenches and screwdrivers: Useful for tightening mounting hardware.
- Measuring tape: Helps determine proper placement and cable routing.
- Level: Assists with accurate mounting and positioning.
- Weatherproof sealant: Helps protect areas where cables or hardware enter the RV.
Before beginning, RV owners should review the manufacturer’s installation requirements and make sure the selected mounting method is appropriate for their specific vehicle.
Choose the Right Location for a Clear Satellite Signal
How to Identify the Best Spot for Installation
Location is one of the most important factors affecting Starlink performance. The dish needs a sufficiently unobstructed view of the sky to communicate with satellites. Trees, buildings, cliffs, and other large objects can interfere with the connection.
Before permanently mounting the equipment, inspect the intended location carefully. Consider how nearby trees or structures may affect the dish at different times of the day and in different seasons.
For travelers who frequently move between locations, portability is particularly important. A setup that works perfectly at one campsite may perform differently at another because of surrounding terrain and obstacles.
The Impact of Terrain on Starlink Performance
Terrain can significantly influence satellite connectivity. Mountainous areas, valleys, forests, and locations surrounded by tall structures may create more obstacles than open campsites.
An elevated location can sometimes provide a better view of the sky, while a valley may restrict the available line of sight. RV owners should evaluate their surroundings before deciding where to position the dish.
Using the Starlink app to check for obstructions can also help identify potential problems before making a permanent installation. Taking time to evaluate the campsite can prevent unnecessary adjustments later.
Select a Secure Mounting System
Choosing Between Ground, Roof, or Adjustable Mounts
The mounting method can have a major effect on convenience, stability, and performance.
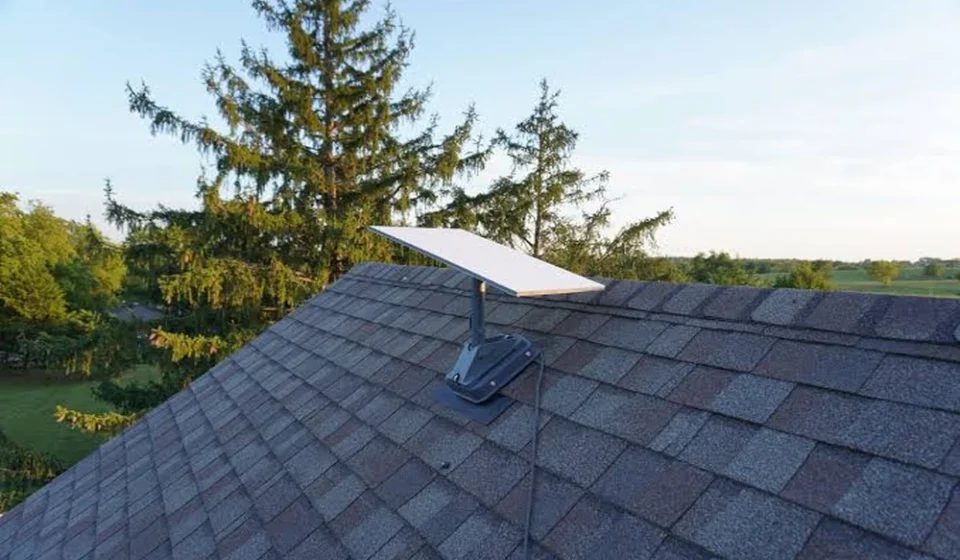
Roof mounts can provide a stable and elevated position, potentially giving the dish a broader view of the sky. However, they require careful installation and may increase the overall height of the RV.
Ground mounts are easier to reposition and can be useful when travelers don’t want to permanently modify their vehicles. However, they must be placed securely to prevent movement caused by wind or accidental contact.
Adjustable mounts provide flexibility for RV owners who frequently change locations. They can be repositioned when campsite conditions change, although they may require additional setup time.
The best choice depends on how frequently the RV travels, where it is typically parked, and whether a permanent or portable solution is preferred.
How Orientation Affects Signal Strength and Stability
Proper positioning is essential for reliable Starlink performance. The dish should be placed according to the manufacturer’s guidance and given enough unobstructed sky to establish and maintain a connection.
RV owners should avoid assuming that the same positioning will work everywhere. Different destinations can present different obstacles, so checking the dish’s orientation and obstruction status after relocation is a useful practice.
If connectivity deteriorates after moving the RV, checking the dish’s position should be one of the first troubleshooting steps.
Protect the System From Weather and Travel Conditions
Securing the Equipment Against Wind and Movement
An RV Starlink system needs to withstand the conditions associated with outdoor use. Strong winds can shift improperly secured equipment, while vibration during travel can loosen hardware over time.
All mounting components should be checked periodically for signs of movement, looseness, or damage. Cable connections should also be secured so they don’t become strained or disconnected.
When traveling, the dish and other equipment should be handled according to the manufacturer’s instructions. Components designed for stationary operation should not be left exposed to unnecessary movement or impact.
Protecting Cables and Connections
Cable management is another important part of a successful installation. Loose cables can become damaged, tangled, or disconnected, potentially interrupting service.
Use appropriate routing techniques to keep cables away from sharp edges, excessive heat, moving components, and areas where they could be stepped on. Weather-resistant sealing should also be considered wherever cables pass through an exterior surface.
A clean and organized installation makes future inspections and troubleshooting much easier.
Maintain and Troubleshoot Your RV Starlink System
What to Do When Starlink Isn’t Connecting
Connectivity problems can happen after relocating an RV or experiencing changing environmental conditions. Start with simple checks before assuming there is a serious equipment problem.
First, inspect the dish for obstructions and verify that its position hasn’t shifted. Next, check the power supply and cable connections. The Starlink app can also provide useful information about connectivity, obstructions, and equipment status.
If the problem continues, restarting the system and following the manufacturer’s troubleshooting instructions may resolve the issue. Persistent problems may require additional technical support.
Tips for Ensuring Long-Term Reliability
Regular maintenance can help extend the useful life of the equipment. RV owners should periodically inspect the dish, mounting hardware, cables, and connection points.
Dust, rain, sunlight, and other environmental conditions can affect outdoor equipment over time. Keeping the system clean and checking for visible damage can help identify problems before they become more serious.
Software updates are also important because updates can introduce performance improvements, security enhancements, and bug fixes.
A simple maintenance routine can include:
- Inspecting mounting hardware for looseness.
- Checking cables and connections for damage.
- Looking for new obstructions around the dish.
- Cleaning equipment according to manufacturer recommendations.
- Checking the Starlink app for system alerts.
- Installing available software updates.
- Rechecking the setup after relocating to a new campsite.
FAQ
Can Starlink be used while driving with the RV?
Starlink setups should be used according to the specific equipment and service configuration. A dish that is designed for stationary operation should be secured and handled appropriately while the RV is traveling. Always follow the manufacturer’s instructions for mobile use.
What are the costs associated with setting up Starlink in an RV?
Costs can include the Starlink hardware, subscription service, mounting equipment, cables, and professional installation if needed. The final cost depends on the selected equipment and the type of installation.
How does weather affect Starlink performance?
Heavy rain, snow, and severe weather can temporarily affect satellite connectivity. Although Starlink equipment is designed for outdoor conditions, extreme weather may still cause interruptions.
Is a separate account needed for each RV using Starlink?
This depends on the Starlink service plan and how the equipment is being used. RV owners should check Starlink’s current service options to determine which plan best matches their travel requirements.
What are some common software updates for Starlink users?
Updates can improve system performance, address software issues, and introduce new functionality. Keeping the equipment updated can help maintain reliable operation.
How can users monitor the performance of their Starlink system?
The Starlink app provides information about the system’s connection, equipment status, and potential obstructions. It can be particularly useful when troubleshooting after moving to a new location.
Are there alternative satellite internet services for RVs?
Yes. Other satellite internet providers may offer services suitable for travelers. However, availability, speed, coverage, equipment requirements, and pricing vary, so users should compare current offerings based on their travel destinations and connectivity needs.
What are the best practices for placing the Starlink dish on an RV?
Choose an area with a broad, unobstructed view of the sky and follow the manufacturer’s mounting and positioning requirements. The equipment should be securely installed or positioned and checked after relocating to a new campsite.
Useful Resources